Translating the Virginia Declaration of Rights

Duration: 10 minutes-3 hours
Recommended Ages: Ages 12+, not recommended as an independent activity for children younger than 12
Description: Further your understanding of the Virginia Declaration of Rights by translating it into modern language.

In 1776 the American Revolution was starting to heat up. George Washington was already leading the Continental Army. Virginia and the other colonies in revolt decided to write constitutions to replace their old English governments. 

A group of leading Virginians, including George Mason, met in Williamsburg to create the new government. Many thought Mason had one of the best minds at the gathering. The delegates asked Mason to work on a draft of a “declaration of rights.”  

Mason wrote several pages of ideas about the ways government should work and what rights naturally belonged to the people. Mason used his understanding of history, law, and political theory. When he was done, others added their ideas. The final draft was voted on and approved by the delegates on June 12, 1776.

The Virginia Declaration of Rights includes 16 sections, called “articles.” Some of the document focuses on individual rights, such as the right to a trial by jury or the right to choose one’s religion. 

Other parts are about the structure of the government. For example, the Virginia Declaration of Rights says that judges should be elected (rather than appointed) and that people should not hold government positions just because of who their parents are.

The Virginia Declaration of Rights also talks about the responsibilities of citizens. It says that government will be successful only if citizens have good character and live up to their values.

One of the most important ideas in the Virginia Declaration of Rights is that the purpose of government is to provide for the “common benefit,” not to make certain people wealthy or to provide them with special favors.

Discover for yourself what the document says.  George Mason’s words are sometimes confusing to 21st-century readers, though.  You might want to re-write the Virginia Declaration of Rights in modern language.  Click on the links below to download Gunston Hall’s “Translate the Virginia Declaration of Rights Worksheets” and a glossary to help navigate the historic terminology.

Drinking Chocolate

Duration: 20-30 minutes
Recommended Ages: Kids 8+ with adult supervision for chocolate.  Adults 21+ for chocolate wine recipe.
Description: Use ingredients you have at home to make delicious hot chocolate recipes from the 18th century.

Colonial Cooking

Chocolate has a fascinating history.  As Spanish explorers plundered Central and South America, they learned about local foods, including cacao.  Though they first found it bitter, they soon discovered that when they added sugar and spices that suited their flavor palate, they could create a beverage more to their taste.  Starting in the early 16th century, they took cacao back to Europe and started selling this refined chocolate to other European countries.  By the 18th century, English colonists brought chocolate back to the New World; they often drank it with their breakfasts.  This beverage likely graced the table at Gunston Hall during George Mason’s lifetime.

When it was first introduced in Europe, doctors thought that chocolate was “a good medicine; at least a diet, for keeping up the warmth of the stomach;” an idea which didn’t fade through much of the 18th century. During the French and Indian War in the 1750s Benjamin Franklin procured supplies for the British Army, and one of the goods he managed to secure was chocolate.  

Colonists continued to believe that chocolate drinks helped keep people strong. In fact, chocolate appears in many records from the American Revolution.  For example, the general orders of the Massachusetts provincial congress in 1775 mandated that once a week every company of soldiers should receive “6 pounds of chocolate.”  The Virginia General Assembly passed a resolution in 1778 to immediately pay officers and soldiers for six months and furnish them with “a variety of Articles which by Custom and habit are become Almost the Necessaries of Life.”  These necessities included “chocolate at half a Dollar per pound.”  

Even George Washington’s surviving papers from the Revolution show how much he valued chocolate.  Washington spent much of the war trying to get supplies–including chocolate–for his poorly outfitted army.  He sought chocolate for his own consumption and for his soldiers’ use.  In 1780, a committee of the Continental Congress assigned to confer with Washington about the state of supplies for the army noted that 

We have omitted observing that the Medical department are destitute of those necessaries, which are indispensable for the sick. They have neither wine, Tea, sugar, Coffee, Chocolate, or spirits. We wish orders may be given for an immediate supply, as the army grow more sickly every hour.”

George Mason, like Washington and many others, provided goods to the army during the American Revolution.  The few remaining records indicate that Mason found bacon and salt for the army.  Perhaps he also procured chocolate for the military. 

"Native American and Chocolate." Jean Girin and Barthelemy Riviere. 1685. Courtesy of the John Carter Brown Library.

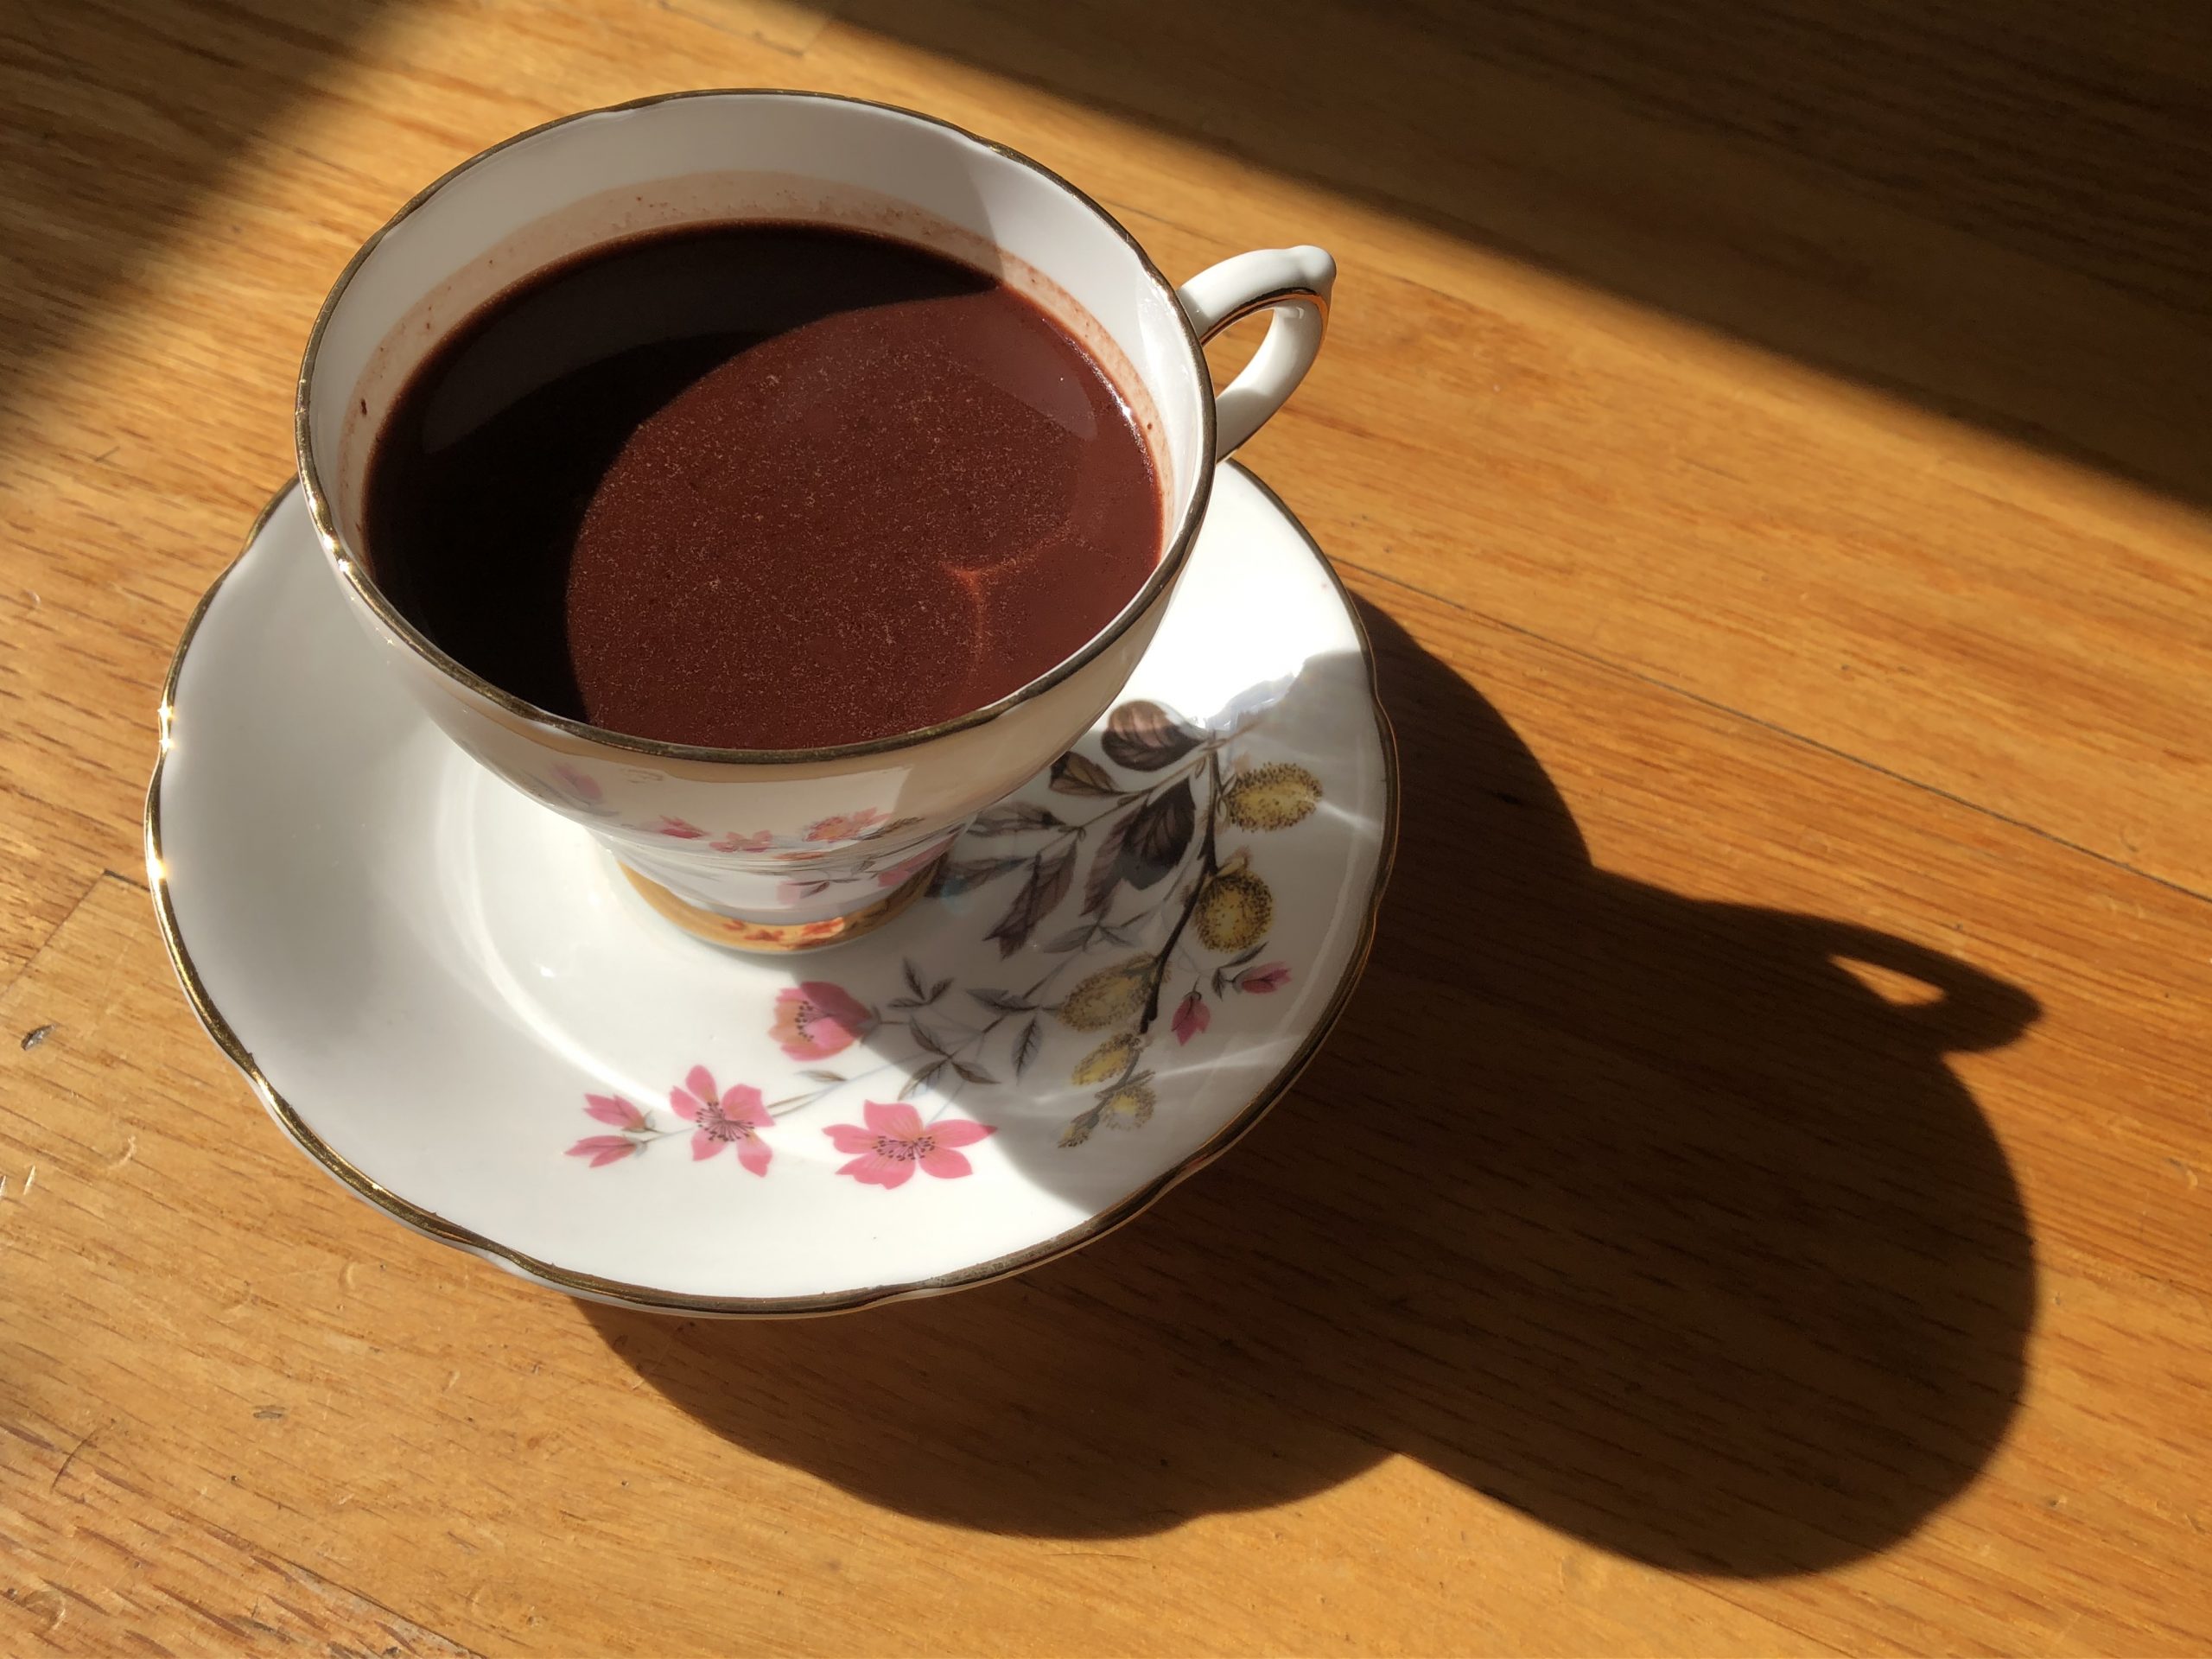
By the Revolution, drinking chocolate usually contained pure cacao, sugar, and, when available, milk.  It included a blend of healthy fats, sugar, and protein in a liquid form.  People believed it to be easily consumed and digested by those otherwise unable to eat.  Many recipes for chocolate, including the one below for chocolate wine, also included alcohol.  Brandy frequently makes an appearance in boozy chocolate recipes, along with Port and sherry.  The chocolate recipes below, whether you choose kid-safe or adults-only, produce a delectable treat: a thick, velvety drinking chocolate.  Feel free to spice the chocolate with cinnamon, clove, nutmeg, and even chili pepper, all common in 18th-century chocolate.  Serve it after dinner with a dollop of whipped cream for an extra special treat.

Chocolate

Many people boil chocolate in a coffee pot; but I think it better to boil it in a skillet or something open. A piece of chocolate as big as a dollar is the usual quantity for a quart of water; but some put in more, some put in less.  When it boils put in as much milk as you like and let them boil together three or four minutes.  It is much richer with the milk boiled in it.  Put the sugar in either before or after, as you please.  Nutmeg improves it.  The chocolate should be scraped fine before it is put into the water.
Child, Lydia Maria. The Frugal American Housewife, 1833.

Notes:  The size of a dollar coin in this time was approximately 1.5 inches, probably about ¼ cup.  This ratio results in a thin, milky hot chocolate, akin to warm chocolate milk.  Other recipes like the one for chocolate wine below, recommend a ratio of 4 ounces (or ¾ cup of chocolate) to a pint or quart of liquid, creating a much thicker and more luscious chocolate drink.  Our adaptation of this recipe is somewhere in between. It makes four servings.

Recipe Adaptation

Servings: 4 x 8 oz hot chocolates
Cook Time: 15 minutes

½ c. unsweetened bakers chocolate (chopped) or chocolate chips
½ c. sugar (omit, or cut to ¼ c. if using chocolate chips)
Water, enough to cover the chocolate
3-½ c. milk use whatever milk you have at home.  In the 18th century, milk was similar to our  whole milk, but this recipe works well with 2% and fat free milk, as well as with almond or coconut milk.
Nutmeg

1. Put your chocolate in a small saucepan over low to medium-low heat.  Just cover the chocolate with water, about ½ c.  Stir occasionally as the chocolate melts, and work to combine the chocolate and water into a smooth mixture.  Melt the chocolate very carefully to keep from scorching it. Scorched chocolate tastes off and will not mix with the milk.  If you have a double boiler, you may wish to use that to further prevent burning.

2. You may see little chunks of chocolate in your liquid even after stirring.  Heat the mixture a little longer and stir vigorously again, until the chocolate melts completely.

3. Slowly pour in your milk, stirring as you add it.  You may be able to see more particles of chocolate in your pan.  That’s okay.  Repeat step two until the mixture is smooth.  Add the sugar and stir until dissolved.

4. Allow the mixture to cook on low heat, bringing it to simmer but not boil.  Stirring occasionally, continue heating for 5 minutes or until somewhat thickened.

5. Pour your chocolate into mugs, and top with grated nutmeg if desired.  Serve immediately.

To make Wine Chocolate

Take a pint of Sherry, or a pint and a half of red Port, four Ounces and a half of Chocolate, six Ounces of fine Sugar, and half an Ounce of white Starch or fine Flour; mix, dissolve, and boil these all together as before.  But if your Chocolate be with Sugar, take double the Quantity of Chocolate, and half the Quantity of Sugar; and so in all.
Nott, John. The Cooks and Confectioners Dictionary, 1723.

Note: John Nott refers to a previous recipe when he uses the words “as before.” He is indicating that the cook should dissolve all the ingredients together and boil them, and that the chocolate “will be done in ten or twelve Minutes.”

Recipe Adaptation:

Servings: 4x 4oz glasses
Cook Time 15-20 minutes

1 c. Sherry or 1-½ c. red Port
¼ c. + 2 tbsp unsweetened bakers chocolate or ¾ c chocolate chips
¼ c. + 2 tbsp sugar (omit or cut to 3 Tbsp for chocolate chips)
1-½ tbsp. flour (You may substitute 1 Tbsp of cornstarch or rice flour.  Arrowroot is not a good choice for this recipe.)

1. Add the chocolate to a small saucepan over low heat.  Melt the chocolate carefully, adding a small amount of the sherry or port to prevent scorching if necessary.  If you have a double boiler, you may wish to use that as an extra insurance against burning.

2. Once the chocolate is completely melted, add the sugar, and stir until dissolved.

3. Add ¾ cup of your sherry or Port to the chocolate, and stir until combined.

4. Whisk together the remaining sherry or Port with the flour until they are completely combined.  This technique helps prevent clumps of uncooked flour in the final beverage.  Add this mixture, or slurry, to the saucepan and cook, stirring frequently, until the mixture has thickened.  The chocolate should take about 10 minutes to thicken.

5. Give the mixture a final whisking to ensure all of the ingredients are fully combined.  Serve warm or at room temperature.

Sweet Potato Slips

Duration: 15 – 20 minutes the first day, 1 minute each day for 4 – 6 weeks after that until planting, 4 – 5 months until harvesting
Recommended Ages: 5-7 with adult supervision, 8-12 with some adult supervision, 13+ without supervision.
Description:  Prepare your garden for the summer and fall by learning how to propagate sweet potatoes, as well as the importance of sweet potatoes to the 18th century diet.

Colonial Gardening

Enslaved people in colonial Virginia tended gardens of their own, despite working for the people who kept them in bondage six days a week. Sunday, the one day many were free from responsibilities for their owners, was their only day to do everything that was important to them like learning to read, worshipping, visiting friends and family, selling their produce at market, or simply relaxing. Without much time and with little land available, enslaved individuals planted only  small areas. A first-hand report by Julian Niemcewicz, who visited Martha and George Washington’s plantation, Mount Vernon, gives us some details. He described a dwelling for enslaved families, including, “A very small garden planted with vegetables was close by, with 5 or 6 hens.” Archaeological digs at sites of slave housing have turned up evidence of garden vegetables that support letters like Julian’s. 

People held in slavery gardened for numerous reasons. The additional food they grew was likely an important part of their diet. Slave owners, like George Mason, provided rations, often in the form of cornmeal and maybe salted fish or less desirable cuts of meat, to the people they kept in bondage. Rations were often inadequate to families’ needs, and they were always monotonous. Enslaved men and women gardened to provide more calories and a greater diversity of flavors for their families. Enslaved communities may also have been motivated to garden because it connected them to their shared cultural heritage. Many of the crops they grew like okra and black-eyed peas originated in Africa and arrived in America as part of the slave trade. Other crops like sweet potatoes were adopted by enslaved gardeners in America. All of these crops could be prepared in traditional, familiar ways. Enslaved gardeners were also motivated by opportunities to sell their surplus crops in local markets or to their masters. Thomas Jefferson and George Washington’s records indicate occasional purchases of produce from the people they enslaved. 

Enslaved individuals existed within a system that did not fully recognize their humanity. Their ongoing struggle to assert themselves as individuals occurred, in part, through gardening. Men and women held in bondage may have seen gardening as a way to better control their food supply, to assert themselves as a community with shared experience and knowledge, and to improve their standard of living.

Detail of ‘Ipomea batatas’ or Sweet Potatoes from The Herball or, Generall Historie of Plantes gathered by John Gerard, 1597. Courtesy of HathiTrust.

Click on the button below to learn more about foods cultivated by enslaved Africans.

Today, you can learn how to grow sweet potato ‘slips.’ Sweet potatoes cannot simply be cut up into small pieces and put into the ground  as regular potatoes can. Green shoots must first grow out of a whole sweet potato. The new foliage can be cut to make a ‘slip.’ These little tiny plants called ‘slips’ are used to make new sweet potatoes that will do great in your garden. A single sweet potato may make several dozen slips; each slip can yield several sweet potatoes in the fall! 

If you’re not ready to grow your own sweet potatoes, but want to  learn more about how colonial gardens gave rise to American cuisine, check out our recipe for:

What do you need?

Both Methods:
Whole organic sweet potato: Organic sweet potatoes begin growing much faster than non-organic ones, we recommend using organic sweet potatoes for this process.
Scissors
Water
A warm spot

See the descriptions below for the specific supplies for each method.

Sweet potatoes like this are on their way to making ‘slips.’ Orient the growing parts upwards. It will never be perfect, but the plant will orient itself over time.

Both Methods

Select a sweet potato(es). We recommend setting up 3 or 4 plantings as a safety net in case some fail to sprout and to make enough “slips” for a home garden. Make sure the sweet potato is not visibly damaged or bruised (see the examples in the picture). 

These healthy sweet potatoes are ready to grow.
Sweet potatoes like these, with scar tissue and black patches, are more likely to rot and decay than produce healthy slips.

Cup Method

Other supplies

A Cup: It must be wide enough to fit a sweet potato
Tooth picks

Water

1. Double check that the sweet potato fits into the cup you plan to use. Take 4 toothpicks and press them into the sweet potato to make a ring around the potato about half way down.

2. Place the sweet potato into your cup; and fill it with water about a half inch below the tooth picks. Water up to the toothpicks will spill and may cause rot. 

3. Find the warmest and sunniest place in your house. Place your cup there. Sweet potatoes thrive in temperatures over 80˙.  A warm space will grow faster and produce many more ‘slips’ than a cool one. A sunny windowsill or a well-lit room near a radiator are good options.

4. Check every few days to ensure that the water level is keeping the lower half submerged. As new roots form, make sure they remain underwater. Visually check for areas that are off-color, as these may be rotting. If this happens, the set must be discarded. If the water becomes cloudy pour it out and refill the cup with fresh water. Within a few weeks sweet potato slips will appear.

5. Cut these slips at the base of the sweet potato when they are 6 or more inches long. Place them in a small cup of water until roots emerge and grow 2 to 3 inches long.

6. Remove the bottom third of the leaves and directly plant the slips into soil. June and July are good times to start planting; the earlier the better. Water them every day during the first week. Keep the soil damp while they are establishing.

7. Sweet potatoes grow all season long. Begin digging around the base of your plants before the first frost. Be careful not to damage the fresh tubers. This may be done in late September or early October.

8. Once you have harvested the sweet potatoes, leave them in a warm space or garage for 1 to 2 weeks to help the roots develop a full skin. This process, called curing, helps them keep longer than just storing them right away. Once you have cured your sweet potatoes, store them in a location that is cool, dry, and dark.

The first root is circled in red. Because it is above the water level, we need to add more liquid.

Pot Method

Other Supplies

Flower Pot: It must be deep enough to fully bury a sweet potato.
Soil

Step 1: Place your sweet potato in your pot.
Step 1: Cover your sweet potato with 1-2 inches of soil.

1. Make sure your pot is deep enough to cover all the sweet potatoes and to allow 3 to 4 inches between each. Add some soil to the bottom of your pot. Place sweet potatoes in the pot 2 to 3 inches apart. Cover with 1 to 2 inches of soil.

2. Find the warmest and sunniest place in your house. Place the pot there. Sweet potatoes thrive in temperatures over 80˙. A warm space will grow faster and produce many more ‘slips’ than a cool one.. A sunny windowsill or a well lit room near a radiator are good options.

3. Check every 2 to 3 days and water as needed. Soil must remain moist but not soppy. Overwatering will cause rotting. Lightly touching the soil surface is a good way to check. Within a few weeks sweet potato sprouts will appear. 

4. Cut these sprouts off at the soil level when they are six or more inches long. This may take a month or so. Place them in a small cup of water until roots emerge and grow 2 to 3 inches long.

5. Remove the bottom third of the leaves and directly plant the slips into soil. Plant in June and July; the earlier the better.  Water them every day during the first week! As you harvest you may leave your mother plant growing. It will continue to produce slips over the coming weeks.

6. Sweet potatoes grow all season long. Begin digging around the base of your plants before the first frost. Be careful not to damage the fresh tubers. This may be done in late September or early October.

7. Leave in a warm space or garage for 1 to 2 weeks to help the roots develop a full skin. This process, called curing, helps them keep longer than just storing them right away. Once cured, place your sweet potatoes in a location that is cool, dry, and dark.

Native Plants, Imports, and Subsitutions

Many of the crops grown by enslaved peoples were first cultivated in Africa. These crops included okra, black-eyed peas, watermelon, peanut or goober nut, black rice, sorghum, and finger millet. Names and more common uses of these crops recall their African heritage. The English name ‘okra’ evolved from Igbo, a language spoken in Nigeria, word ‘okuru.’ Okra was also called ‘ngombo’ in several different Bantu languages. Today the Bantu word ngombo refers to okra soup or gumbo. Finally, the peanut, which is often called the goober nut, recalls the Bantu word ‘nguba.’ 

Enslaved gardeners in the English colonies adopted crops to replace the African crops that did not grow well in the Americas. Crops domesticated, or first cultivated, in Africa are adapted to more tropical climates. As a result, many crops from West Africa do best with long warm growing seasons. The tropical climate of Africa allowed for the cultivation of different greens that were fundamental to many of the culinary traditions from West Africa. Many of these greens like African spinach, rugare, and cocoyam leaves could not be grown successfully in the colonies. Instead, members of enslaved communities grew greens from Europe like collards and spinach, as well as greens from the Americas like amaranth (also called callaloo) instead. Yams were the most important staple crop in Africa, but they could not be grown in the shorter growing seasons in the English colonies. Sweet potatoes, originally cultivated in the Americas, are similar to yams, and descendants of African peoples brought to the Americas widely adopted them as a substitute.

The adoption and movement of crops in this time period was multi-directional. Europeans conducting trade took many crops from Europe and the Americas to Western Africa during the colonial era. Adam Afzlius, a Swedish botanist, traveled to Sierra Leone in the 1790s and observed the cultivation of a wide variety of European and American crops. He reported that “Cabbage, purslane, sage, certain kinds of beans, . . .thyme, cresses. . .and some American vegetables thrive.” These American crops may have included corn and sweet potatoes. These imported crops joined root crops and grains as important food stuffs for West Africa, enriching the diverse agricultural systems that thrived in the region. 

The exchange of crops within the Atlantic world created diverse outcomes. Many among the lowest social classes in Europe and Africa benefited from the sharing of staple crops types like corn, sweet potatoes, or potatoes. Yet, the growing consumer demand in Europe for cash crops like tobacco, sugar, and rice helped to solidify and expand the institution of slavery.

Negus

Duration: 20 minutes or up two hours for more flavor
Recommended Ages: Adults over 21
Description: Make and taste this popular wine-based drink from George Mason’s lifetime, and learn about how non-importation affected colonists.

Colonial Cocktails

During George Mason’s lifetime, several mixed drinks, or proto-cocktails if you will, rose to prominence.  This family of drinks, which included punch [link to the punch page], toddy, and negus, focused on a blend of alcohol, citrus, and sugar.  The person mixing the drink, often the host or a participant at a party, decided on how much of each ingredient to include, so each batch likely had a different taste.  Some batches were sweeter, others more tart, and some heavier with alcohol.  

In its heyday, negus usually contained roughly equal parts of water and wine  Eventually the basic recipe evolved, with cookbooks suggesting mixing one part of wine with four parts of water.  Author Isabella Beeton wrote that such a watered-down drink was appropriate only for children’s parties.  (Yes, you read that right.  Mid-19th-century cookbooks really did recommend serving weak sweetened wine to kids.)

Let’s return to the 18th century.  All of the ingredients for negus—wine, sugar, and lemon—were imports from other British colonies in the Caribbean or Europe.  Sugar, for example, was largely manufactured in colonies such as Barbados and Jamaica, where it was produced with slave labor.  

Starting in the 1760s, and through the American Revolution, goods like sugar and wine became less available.  In the beginning, this was due to the heavy taxes imposed by the British government.  However, many American colonists protested and began forming non-importation, or boycotting, associations refusing to purchase goods including wine, lemons, and sugar.

To learn more about the non-importation agreements, read the text below.

Our recipe for negus harkens to the days before non-importation, full of lemon, sugar, and wine.  Serve this scrumptious drink immediately; it’s not nearly as good cold.

Negus

  1. INGREDIENTS: To every pint of port wine allow 1 quart of boiling water, ¼ lb. of sugar, 1 lemon, grated nutmeg to taste.

Mode: As this beverage is more usually drunk at children’s parties than at any other, the wine need not be very old or expensive for the purpose, a new fruity wine answering very well for it. Put the wine into a jug, rub some lumps of sugar (equal to ¼ lb.) on the lemon-rind until all the yellow part of the skin is absorbed, then squeeze the juice, and strain it. Add the sugar and lemon-juice to the port wine, with the grated nutmeg; pour over it the boiling water, cover the jug, and, when the beverage has cooled a little, it will be fit for use. Negus may also be made of sherry, or any other sweet white wine, but is more usually made of port than of any other beverage.

Sufficient: – Allow 1 pint of wine, with the other ingredients in proportion, for a party of 9 or 10 children.
Beeton, Isabella. The Book of Household Management.  1861.

Recipe Adaptation

Servings: 2
Rest Time: 15 minutes to 2 hours
Cook Time: 5 minutes

¼ cup granulated sugar
Zest of one lemon
Juice of one lemon
1 cup of port or red wine a full bodied red wine works best for this beverage
1 cup of boiling water
Nutmeg, to taste

1. In a non-reactive bowl, mix together the sugar and lemon zest.  Let the mixture meld for at least 15 minutes or as much as an hour or two, stirring occasionally.  Over time, the sugar absorbs the fragrant oils from the zest, giving your beverage a light citrusy scent.  (Please use a glass, pottery, or stainless steel bowl or pitcher.  Copper, cast iron, and aluminum will react with the acid in the lemon juice you will add later.)
2. Add the lemon juice to the bowl and stir until completely dissolved.
3. Strain the lemon mixture into a pitcher.  The lemon zest can be unpleasant in the final beverage.  Make sure you choose a pitcher that is suitable for hot liquids.
4. Add the wine to the pitcher, and stir to combine.
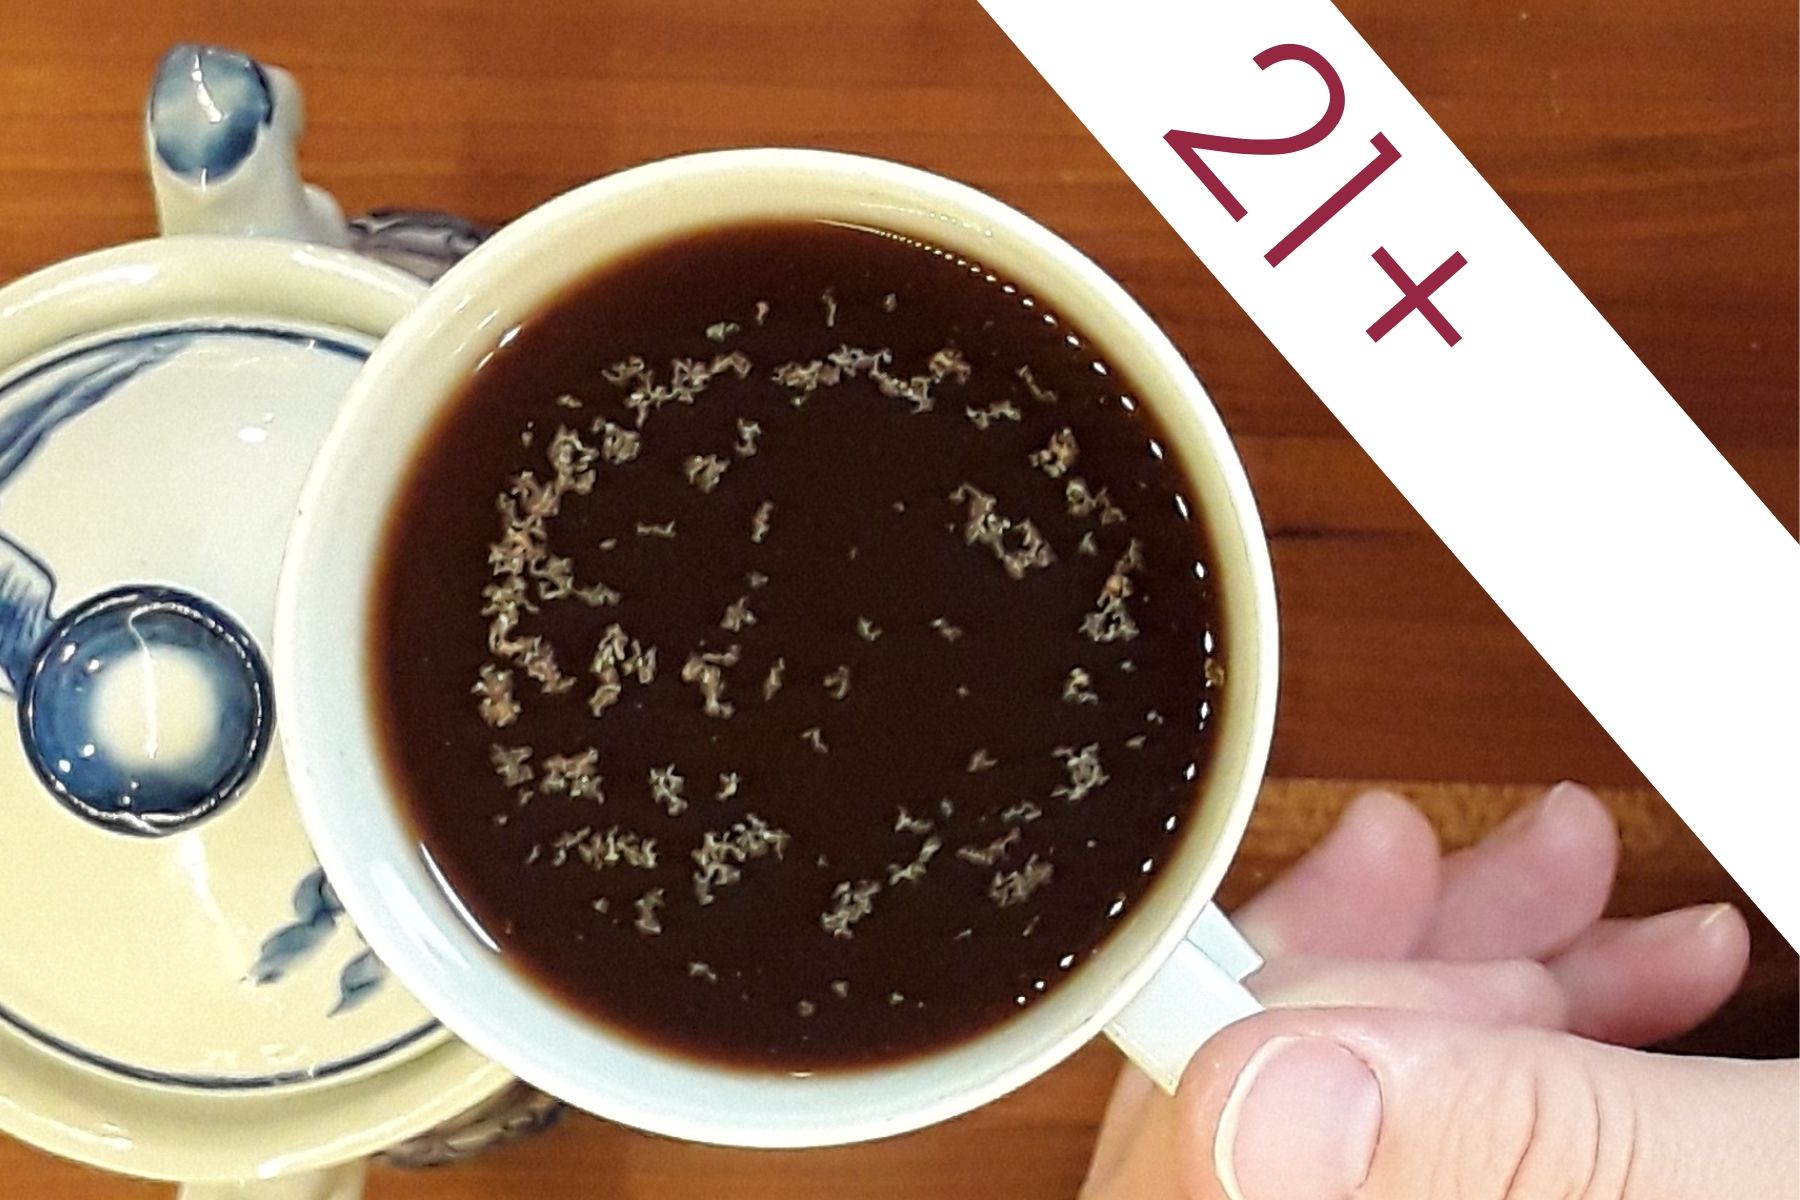
5. Add the boiling water to the pitcher, and serve immediately in mugs or punch cups.

Non-importation Agreements

Following the French and Indian War in the 1750s, the British Parliament levied taxes on American colonists in the form of the Stamp Act (1765), the Townshend Acts (1767), and the Tea Act (1773).  These laws laid out taxes on many of the goods that Americans purchased from Great Britain, her colonies, or other European countries.  Many of the American colonies responded with non-importation associations, boycotting goods in an effort to force policy changes. George Mason authored Virginia’s non-importation plan, ratified May 17, 1769.   By entering this agreement, Virginians agreed to a list of items they would no longer import or buy.  The document includes fruit, wine, and sugar, among many other products.

Virginians could easily supply themselves with some of the goods listed in non-importation agreements.  The ambiguous “fruit” included foods such as apples, cherries, peaches, and pears, which all grew readily in Virginia.   Lemons, limes, and oranges also fell into the category of fruit, but were luxury goods, accessible only to those who could afford imported goods.  A few wealthy people took on the expense of a greenhouse, as  George Washington did at Mount Vernon.

Western Europeans of all social and economic levels used sugar and its byproducts.  Refined white sugar made its way into beverages, cakes, candies, and was used to preserve fruit.  Molasses, the industrial waste of sugar, turned into rum through fermentation and distillation in the northern American colonies.

A collection of papers listing prices for food and drink at inns in the 18th and 19th century.
Detail of a collection of price listings from British Inns. Negus is listed on the same line as wine for 5 shillings at T. Ashford's Inn. Collection of 20 British inn bills, [circa 1780]-1841. Courtesy of The Lewis Walpole Library, Yale University.

The non-importation agreements were very hard to keep.  Merchants found their businesses foundering.  Though Americans were able to produce many products themselves, colonists struggled with the very human desire for goods they were accustomed to.  In the end most of the non-importation associations collapsed.  Although they did not work in their intended fashion, the non-importation agreements did demonstrate the feelings colonists had about taxation without representation.

Negus at Cocktails by Candlelight

Rarebit

Duration: 15 minutes
Recommended Ages: 7-12 with supervision and assistance, 13+ with minimal or no supervision
Description: Broil up the taste of an 18th century tavern with this cheesy toasted bread.

Colonial Cooking

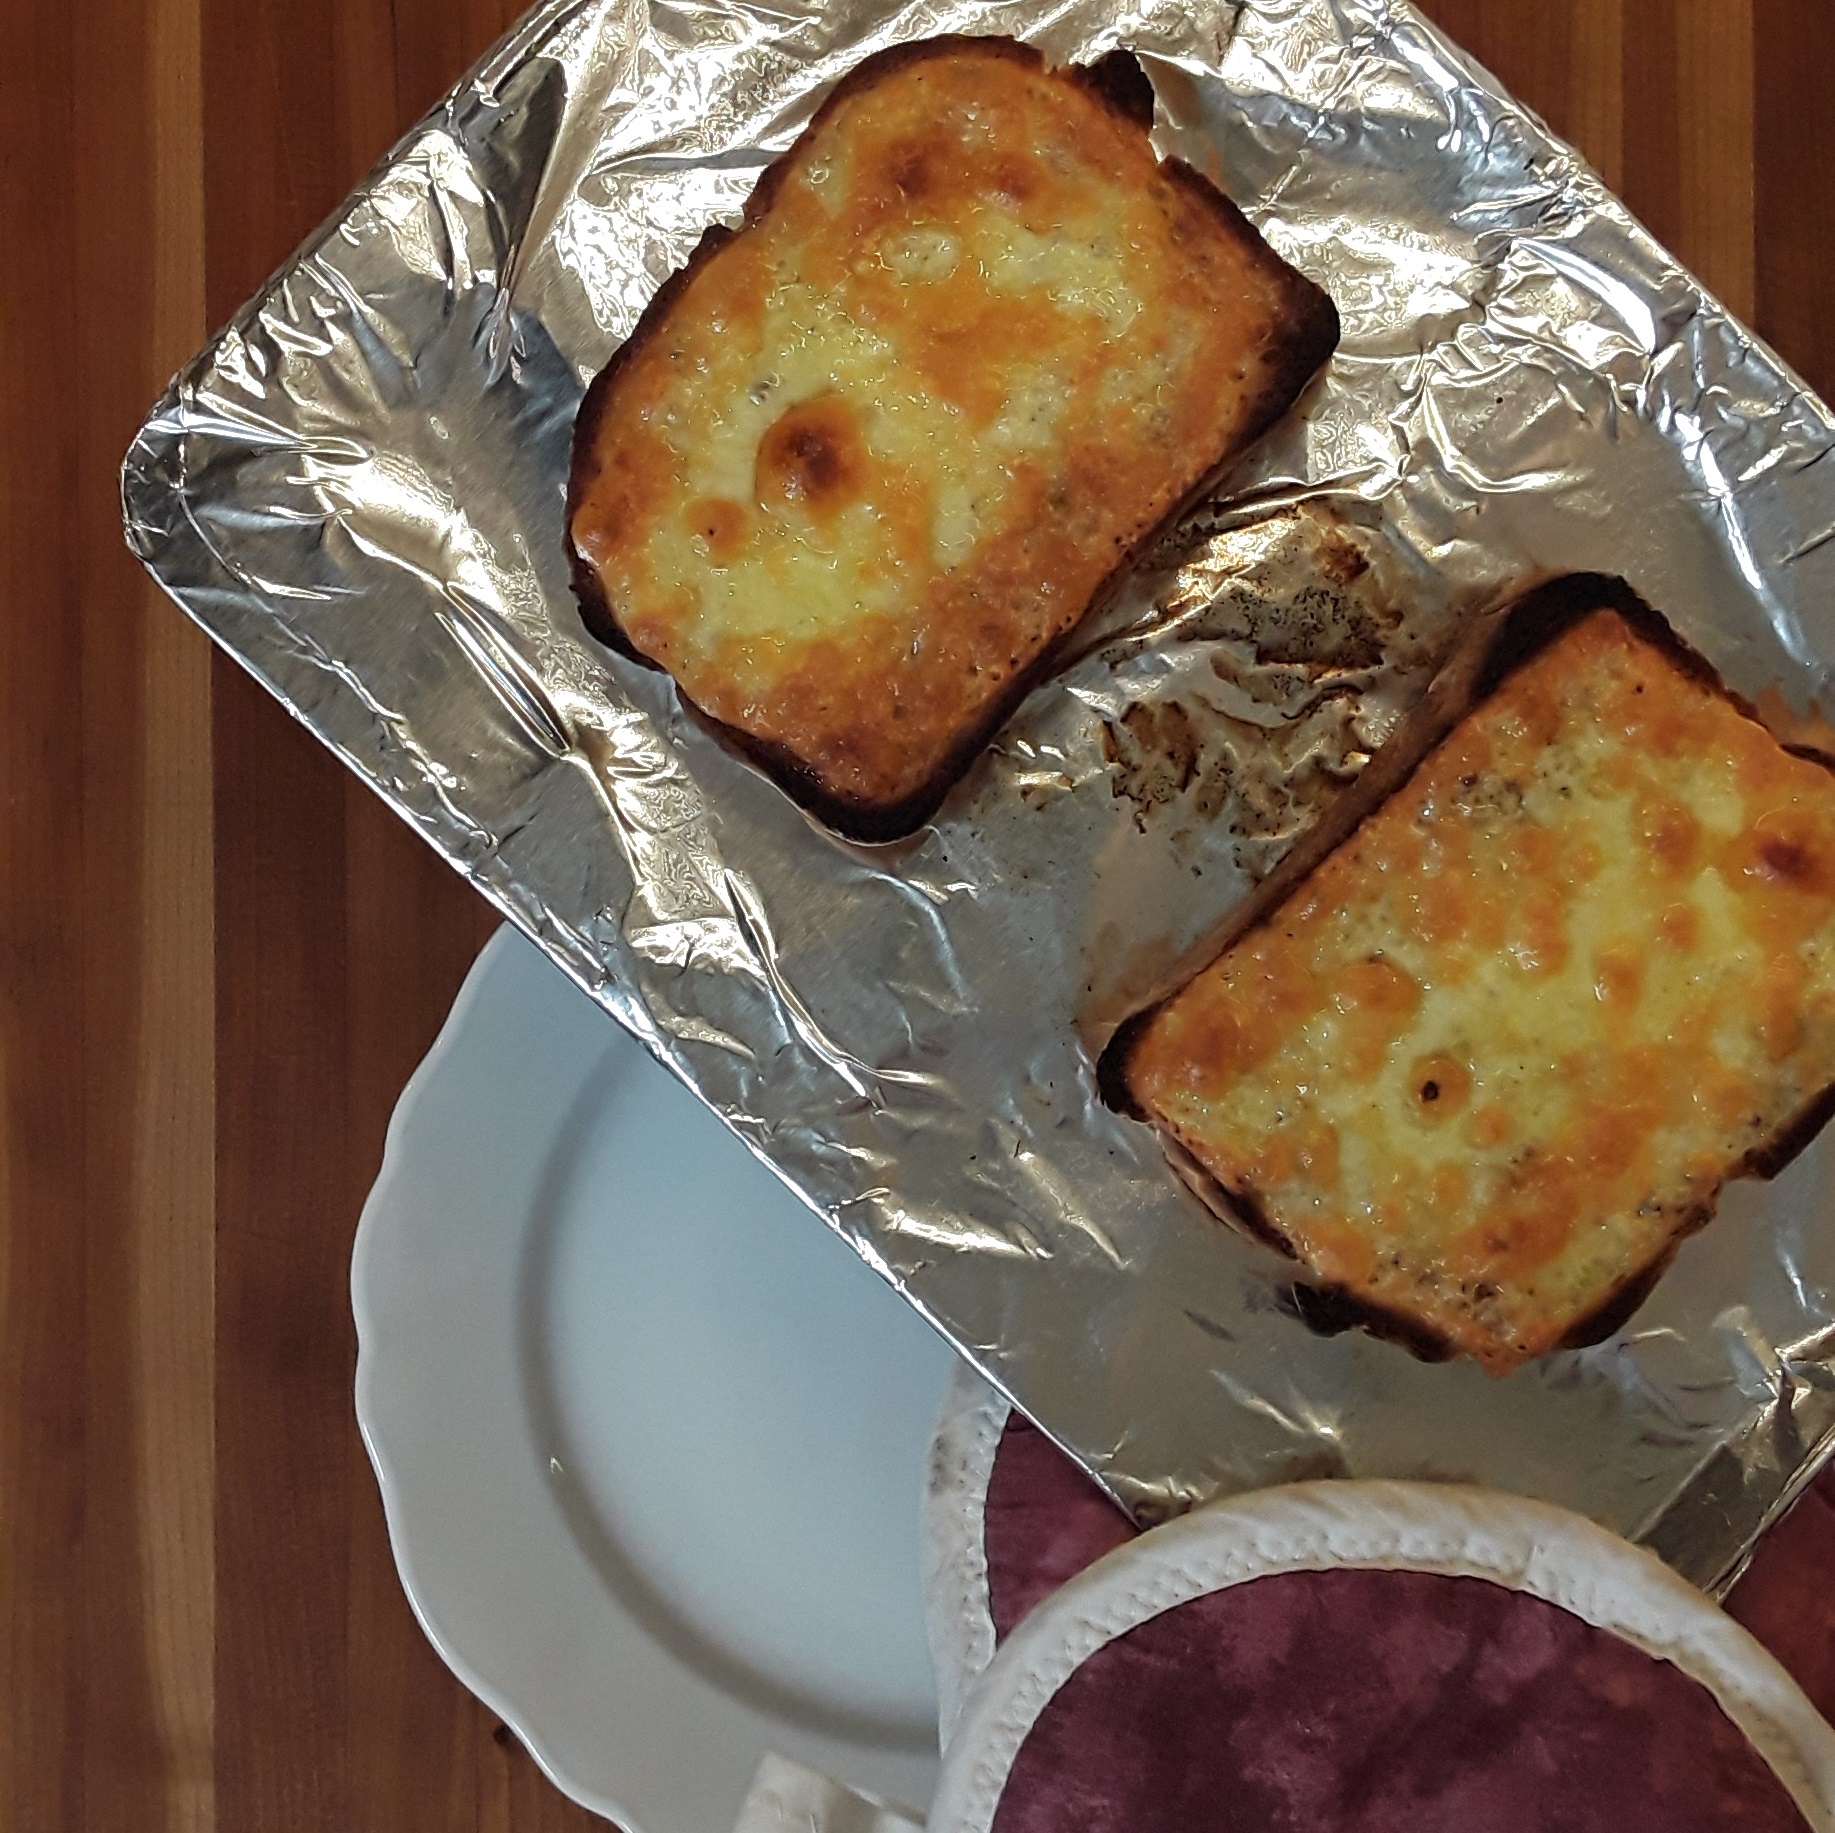
Rarebit is a dish that American colonists brought over from the British Isles.  Its name seems to be a corruption of a dish called “rabbit.”  Dishes made of rabbit meat were common in England.  But, confusingly, neither “rabbit” nor “rarebit” was made from an animal.   There are many variations on the dish, but all of them include cheese and bread.  In cookbooks,  each recipe is slightly different: some have sauces, some are cooked with different techniques.  All look equally tasty.  One of the earliest references to this type of food was in the 1725 journal of poet John Byrom, who mentioned having “Welsh rabbit and stewed cheese.”  It appears he enjoyed this dish when eating out, as he mentions eating it at taverns.  

Tavern food was frequently made early and left to sit all day, often cold.  (Imagine what a piece of roast beef might look like 5 or 6 hours after sitting on a counter.)  In contrast, since this dish could be made quickly–for one person or for several people—rarebit was often made-to-order.  All kitchens in the 18th century had at least a small fire going all day. Tavern kitchens especially needed to be ready to provide for guests coming through at all hours.  With a dish like rarebit, many of the pieces could be prepared in advance and assembled and heated up fast.  Perhaps George Mason ordered some rarebit at a tavern when he traveled to Williamsburg at the beginning of the Revolution or when he went to Philadelphia for the Constitutional Convention.  

Some of the instructions for how to make rarebit are really fascinating.  Cookbook author Hannah Glasse recommends toasting the cheese prior to laying it on the toast.  This was likely achieved by slicing the cheese very thickly and using a toasting fork to hold it in front of the fire.  People in the 18th century used toasting forks for all sorts of food, from muffins to cheese.  We don’t recommend this method for modern kitchens; it can be very messy for those who haven’t practiced.  Check out our adaptation and try either Welsh or English Rarebit.

Toasting Fork. Hearth Kitchen, George Mason's Gunston Hall.

To make a Welsh Rabbit

Toast the bread on both sides, then toast the cheese on one side, lay it on the toast, and with a hot iron brown the other side.  You may rub it over with mustard.

To make an English Rabbit

Toast the bread brown on both sides, lay it in a plate before the fire, pour a glass of red wine over it, and let it soak the wine up. Then cut some cheese very thin and lay it very thick over the bread, put it in a tin oven before the fire, and it will be toasted and browned presently. Serve it away hot.

Hannah Glasse. The Art of Cookery Made Plain & Easy. 1796.

Adaptation

2 slices of bread per person
1 Tbsp of wine per person or 2 tsp of mustard per person
2 oz  per person of hard cheese such as cheddar

1. Prepare a broiler pan or other metal baking pan by covering it with a layer of foil.
2. Slice your cheese very thinly and set aside for later.
3. Toast your bread, getting it as dry as possible, without getting it too dark.  Place your slices of toast on a plate or pan, and pour the wine over them or spread your mustard across the surface.  If you’re using wine, allow it to absorb for a few minutes.
4. Place your slices of toast onto your prepared pan.  Preheat your broiler.
5. Layer cheese onto each slice of bread until the whole surface is covered.  It’s okay to overlap slices, but you don’t want to have very thick layers.
6. Broil the toast until the cheese bubbles and browns, about 3 minutes.
7. Serve hot or at room temperature.

Rarebit at Cocktails by Candlelight

Make an 18th-Century Toast

Duration: 2-15 minutes
Recommended Ages: Adults only
Description: Have a special occasion coming up and want something unique to say for the toast? Learn the history of toasts during the 18th century and make one of your own!

Today we most often use toasts to commemorate important moments in our lives – signing a lease, getting married, or celebrating a special birthday.  People of the 18th century made toasts on special occasions.  They also incorporated toasts into their everyday activities.  Wealthy colonists expected to hear toasts every day at dinner.

The ritual of offering toasts began in men’s social clubs and filtered into everyday use for gentlemen.  In these exclusive groups, like the Governor’s Club in colonial Philadelphia, members praised each other for well-crafted and well-delivered toasts.  Done well, a toast built camaraderie and a sense of a common goal amongst the people who drank to it.  Fine toasts also demonstrated the intelligence, education, and sophistication of the person offering it.  Following a toast, all the attendees took a sip of their drink.  Some events involved many toasts.  As a result, attendees took many sips!

No documents still exist about toasts that George Mason gave, but we have a snippet of his interaction with social drinking in a set of recollections left by his son, John.  According to John, just before dinner everyday, Mason asked one of his sons to prepare a bowl of toddy.  This mixture of rum, water, sugar, and citrus blended in a communal bowl, was first offered to Mason.  The young man said, “I pledge you, Sir,” noting his deference and duty to Mason.  To which Mason responded, “Drink first yourself, Sir.”  Most of his wealthy friends likely followed a similar practice at their own meals.

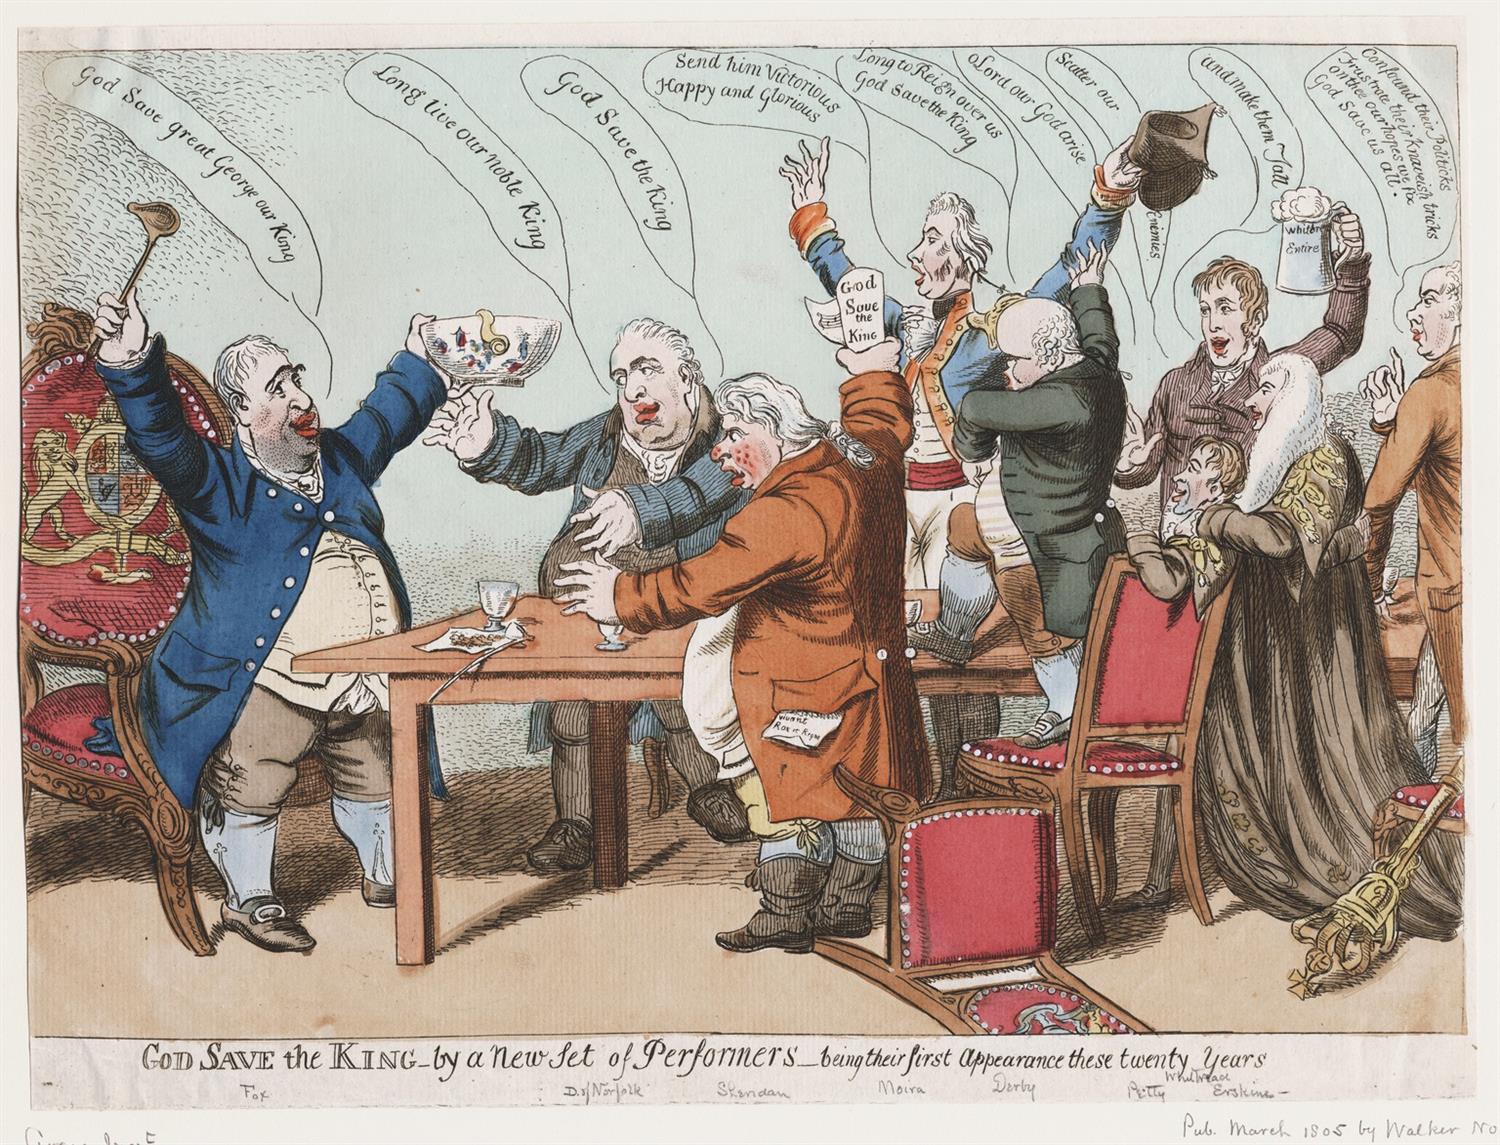
This image illustrates how toasting happened. Toasts like this one were likely common in Virginia in the years before the American Revolution. “God Save the King,” Charles Williams, 1805. Courtesy of the Lewis Walpole Library, Yale University.

At the beginning of George Mason’s lifetime, people drank (and toasted) only with friends.   Drinking together and toasting each other, as well as ideas and people important to the group, solidified the connections amongst compatriots.  Toasts such as the one below reminded people gathered of their shared values and of people they honored:

“To the memory of those departed heroes who sealed our Independence with their blood—Whilst we taste the fruits of their labours, may we never be tempted…to fell our birthright for a mess of pottage.”  The Columbian Mirror and Alexandria Gazette, July 6, 1797.

By the end of the century, in America, etiquette sometimes allowed people of the same social level to drink with strangers.  And, as a result, they sometimes toasted together.  Visitors to the new United States commented on the discomfort they felt at such abnormal interactions.  Today, toasts can demonstrate bonds among groups of friends or family.  In some cases, people offer simple toasts, such as the word “cheers” or the phrase “to your health” even with people they’ve just met.

As George Mason gathered with friends and associates after long days of writing the Virginia Declaration of Rights or debating the Virginia or federal Constitution, he likely proposed and drank to many toasts related to his work. We’ve put together a list of 18th-century appropriate toasts for you to use at your next social event.  Some of them are documented toasts from Mason’s lifetime; you will recognize these by the quotation marks.  Others are toasts we have created in the style of the time.  You can also make up your own!

Are you interested in trying a historic cocktail or mocktail at your party?  Try one of these recipes.

Make an 18th Century Toast

What you need:

Your choice of beverage: punch was the most common beverage used to offer toasts
Your choice of toast

Some things to keep in mind:

1. Let people know they need to be ready for a toast.  Ask them to “charge” their glasses, meaning to refill them to be able to drink after the toast is complete.

2. Consider following the 18th-century ritual of beginning with the words: “Pray, raise your glass. . .”

3. Decide whether you want to end your toast with “three cheers!” Invite your companions to respond heartily by saying “huzzah.”  

(Note, there are two accepted pronunciations of the word.  If you would like to use the modern pronunciation, say [hu za´].  To sound like a person from the 18th century, say [hu ze´])

4. Typically the host offers the first toast, so if you’re hosting the party, you get to start!  You aren’t the host?  We advocate trying to convince your host that toasts are a fun party game.

The Toasts

“To the memory of those departed heroes who sealed our Independence with their blood—Whilst we taste the fruits of their labours, may we never be tempted…to fell our birthright for a mess of pottage.”

“The American people—While they know how to defend the Rights of Man, may they not forget to pay a due regard to government of their own choice—Three Cheers”

“May the citizens of the United State eternally cherish those rights, for which they fought, bled, and conquered”

“Perpetual Union to the Colonies”

“May the Collision of british Flint and American Steel, produce that Spark of Liberty which shall illumine the latest Posterity”

“All true Patriots throughout the World”

“A long and happy peace”

“The Thirteen united Colonies.  The free and independent States of America. The Congress for the Time being. The American Army and Navy.  An happy Election for the Whiggs on the first of May &c”

“For the pleasure of (say the name of the person)  and his/her company.”

“To the health of those friends in company tonight” (mention each individual in turn)

“To the good fortune of the company and generosity of _________” (name someone in company or the host)

“This happy day, and all who honor it.”

To the Virginia Declaration of Rights, long may it cherish the inherent liberties of the citizen.

To Colonel Mason! May his pen continue to be ever mighty, and may his long life be one of service to his people.

Create your own!
Offer your “compliments,” “good health,” or “good fortune” to someone present.

Shrub or Drinking Vinegar

Raspberry Shrub

Raspberry Shrub mixed with water is a pure, delicious drink for summer; and in a country where raspberries are abundant, it is good economy to make it answer instead of Port and Catalonia wine.  Put raspberries in a pan, and scarcely cover them with strong vinegar.  Add a pint of sugar to a pint of juice; (this you can judge by first trying your pan to see how much it holds;) scald it, skim it, and bottle it when cold.

Child, Lydia Maria. The Frugal American Housewife, 1841.


Raspberry drinking vinegar served at Gunston Hall's Summer Saturdays.

Recipe Adaptation

½  cup fruit: raspberries, blackberries, and blueberries make lovely shrub.  If you don’t have fresh, frozen works just as well.
½ cup vinegar: apple cider or distilled vinegar work really well, but you can also explore with flavors and try other vinegars.
½ cup sugar
½ cup water

Hot Method

  1. Heat the water and sugar over medium heat until the sugar is dissolved.  Add fruit and simmer for 2-5 minutes.  Cool
  2. Add the vinegar, and strain the mixture through a sieve or piece of cheesecloth.
  3. Serve over ice.

Cold Method

  1. Put the vinegar and fruit in a glass jar with a tight fitting lid, let sit for at least two hours, or overnight.  
  2. Remove the solids.
  3. Add the sugar to the jar, close tightly, and shake vigorously until the sugar is completely dissolved.
  4. Add the water, and pour over ice.

Notes: This beverage is also good with herbs and spices – ginger, cinnamon, tarragon, and cloves.  Substitute a teaspoon of dried herbs or spices for the ½ cup of fruit.